Artist
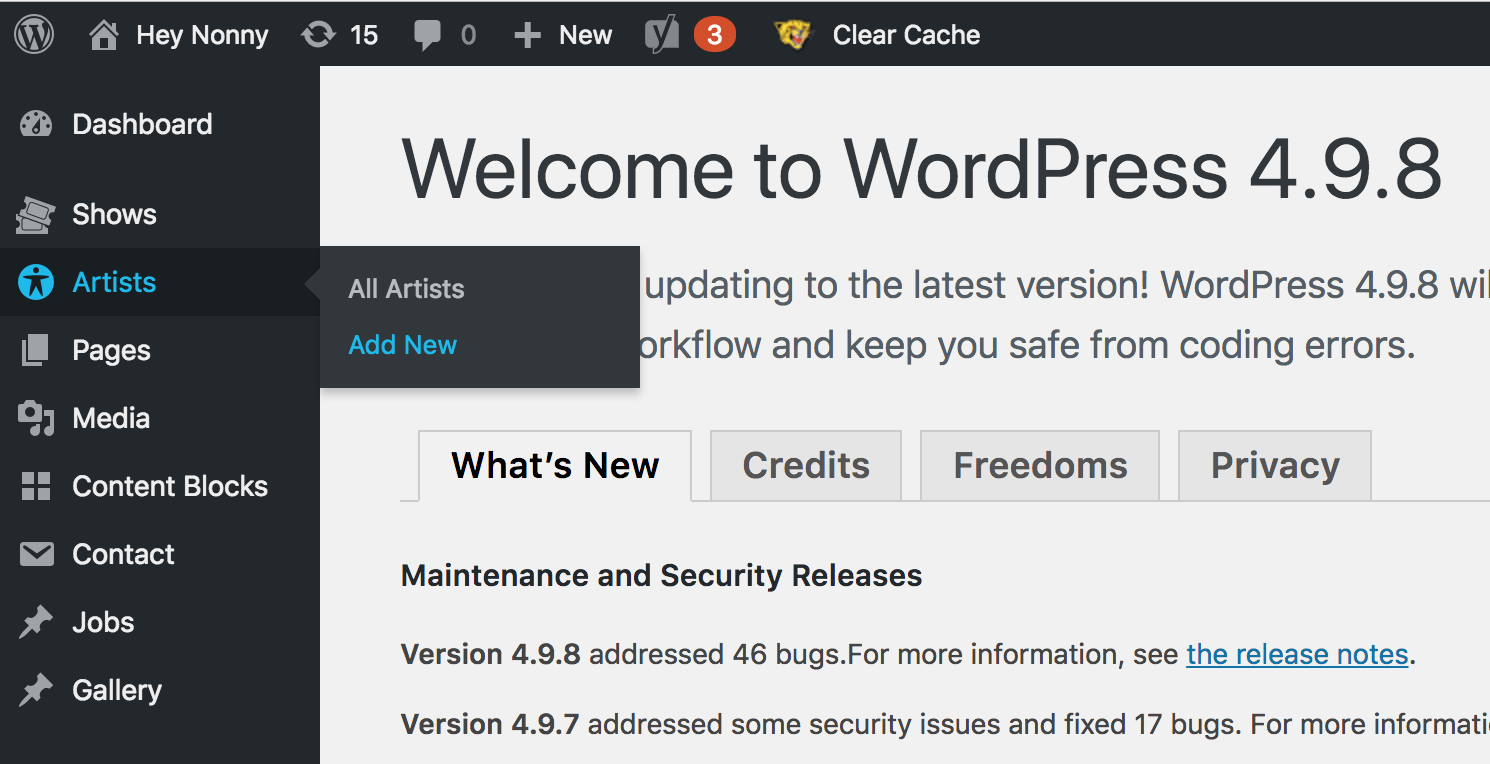
Before creating a show, the artist for the show must be in the WordPress admin. If the artist for a show has not been added yet, go to Artists on the left navigation and click Add New. If the artist already exists, you can skip this step.
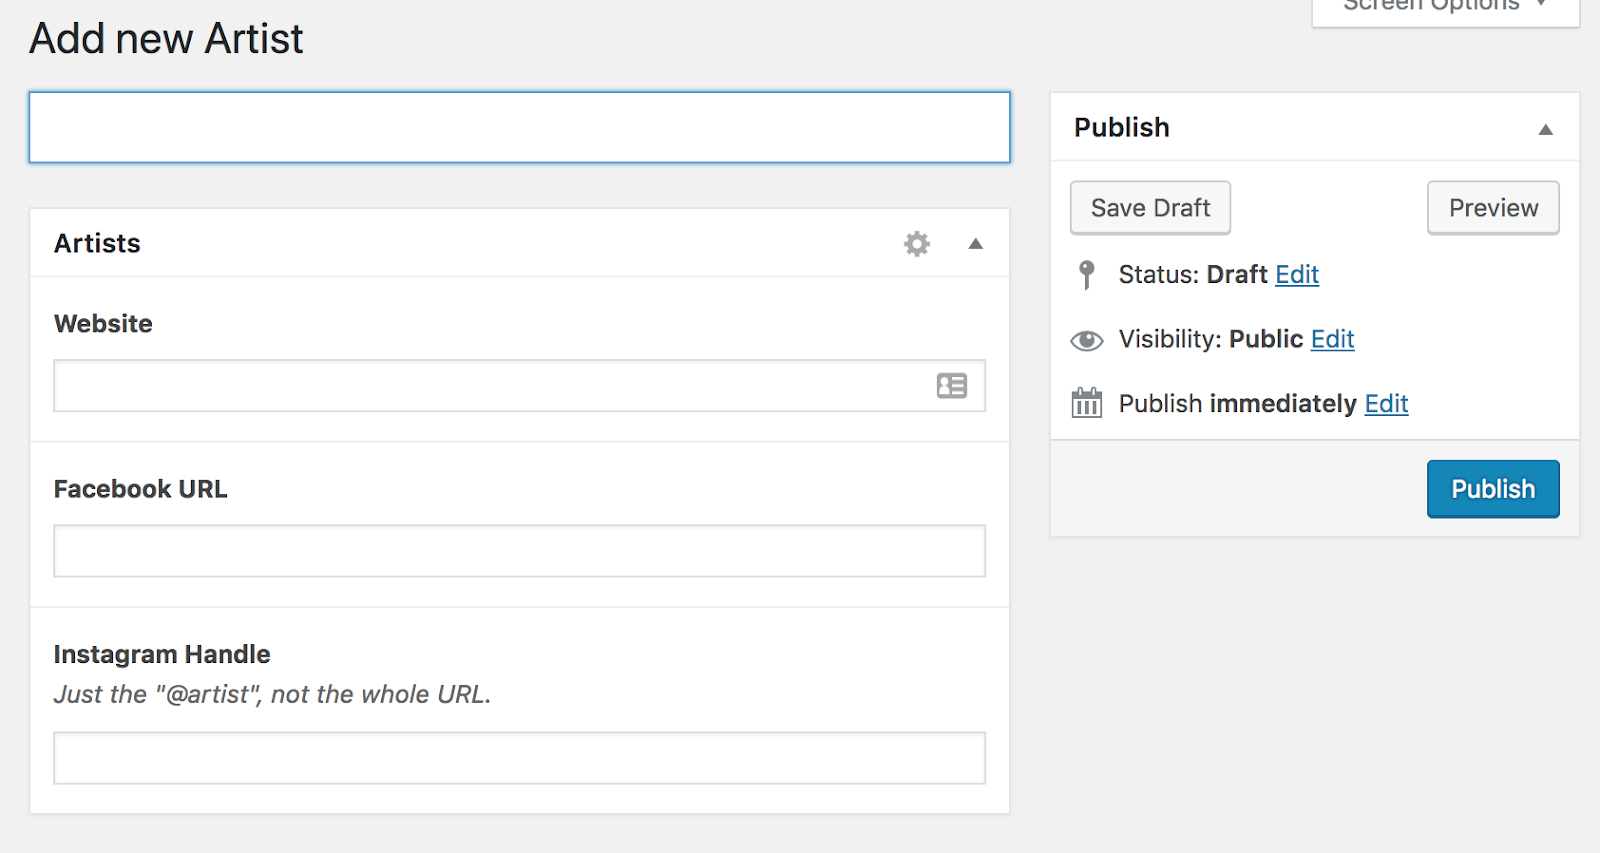
Fill out all of the information for the artist, and then publish the artist.
Show
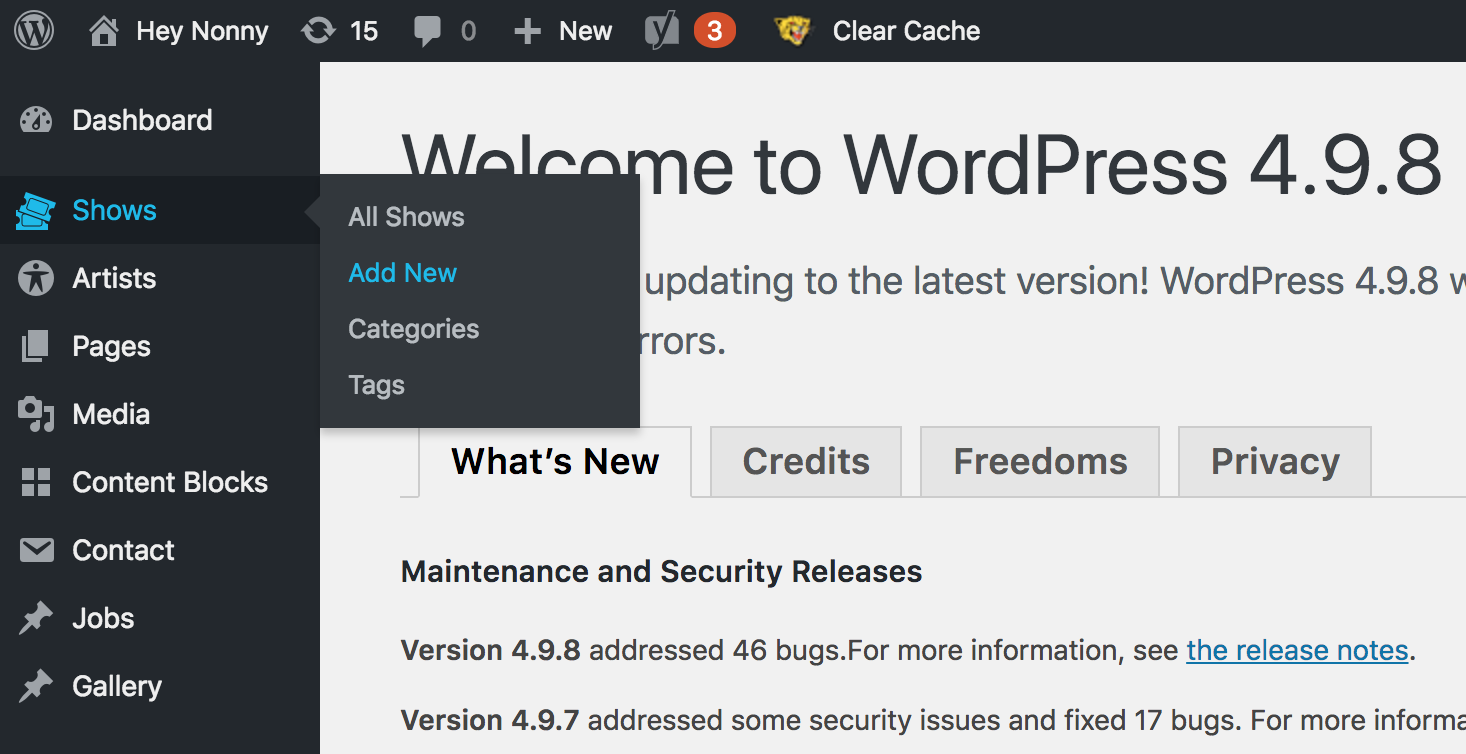
Next, go to “Shows” on the left and click Add New.
Here, enter all of the information for a show. Once the show is ready, click Publish for the show to appear on the site. Otherwise, click Save Draft to save the information.
- Headline (select artist)
- Show image (ideally 857 x 541 pixels; dimension of slider images on home page is 1200 x 541)
- Date and Time of Show
- Door time (optional)
- Refund text (optional)
- Genre (optional)
- Video (optional)
- Additional images (optional)
- Show Description
- Sponsors (optional)
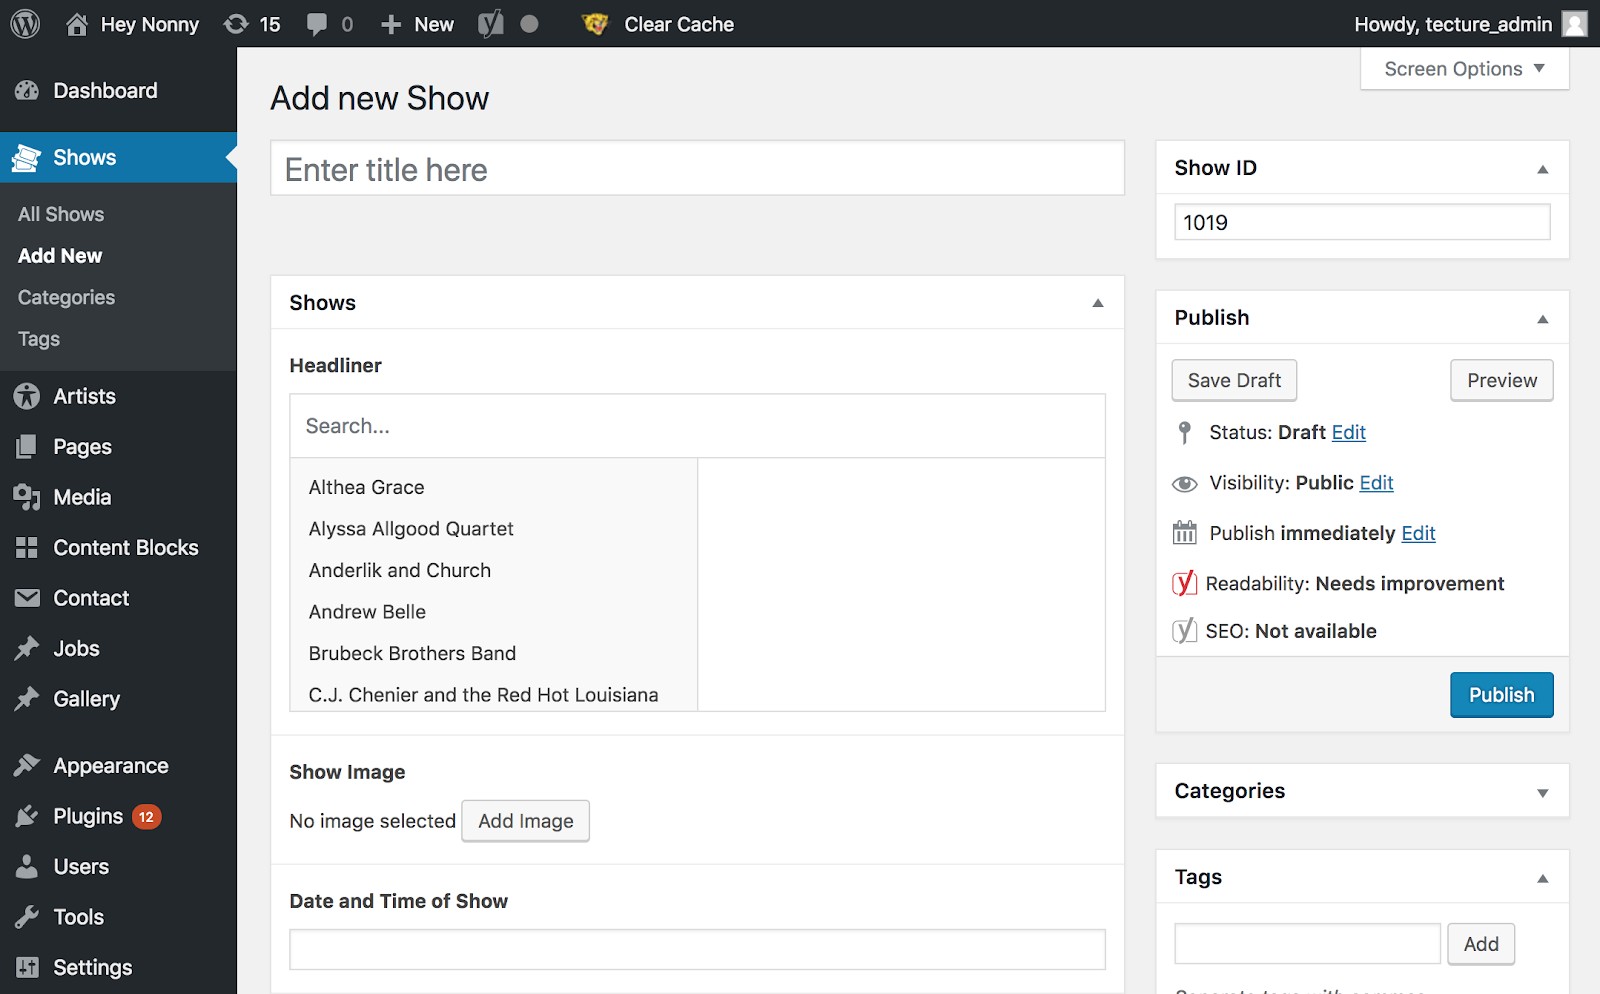
We recommend saving a show as draft until tickets have been set up in Tessera. Make a note of the show ID, as you will need this to import the show into Tessera.