Tessera Seating Charts – SVG Instructions
1. Open the seating chart you want to edit. This should be either an AI or SVG file. We recommend using either Adobe Illustrator or Boxy SVG (https://boxy-svg.com/).

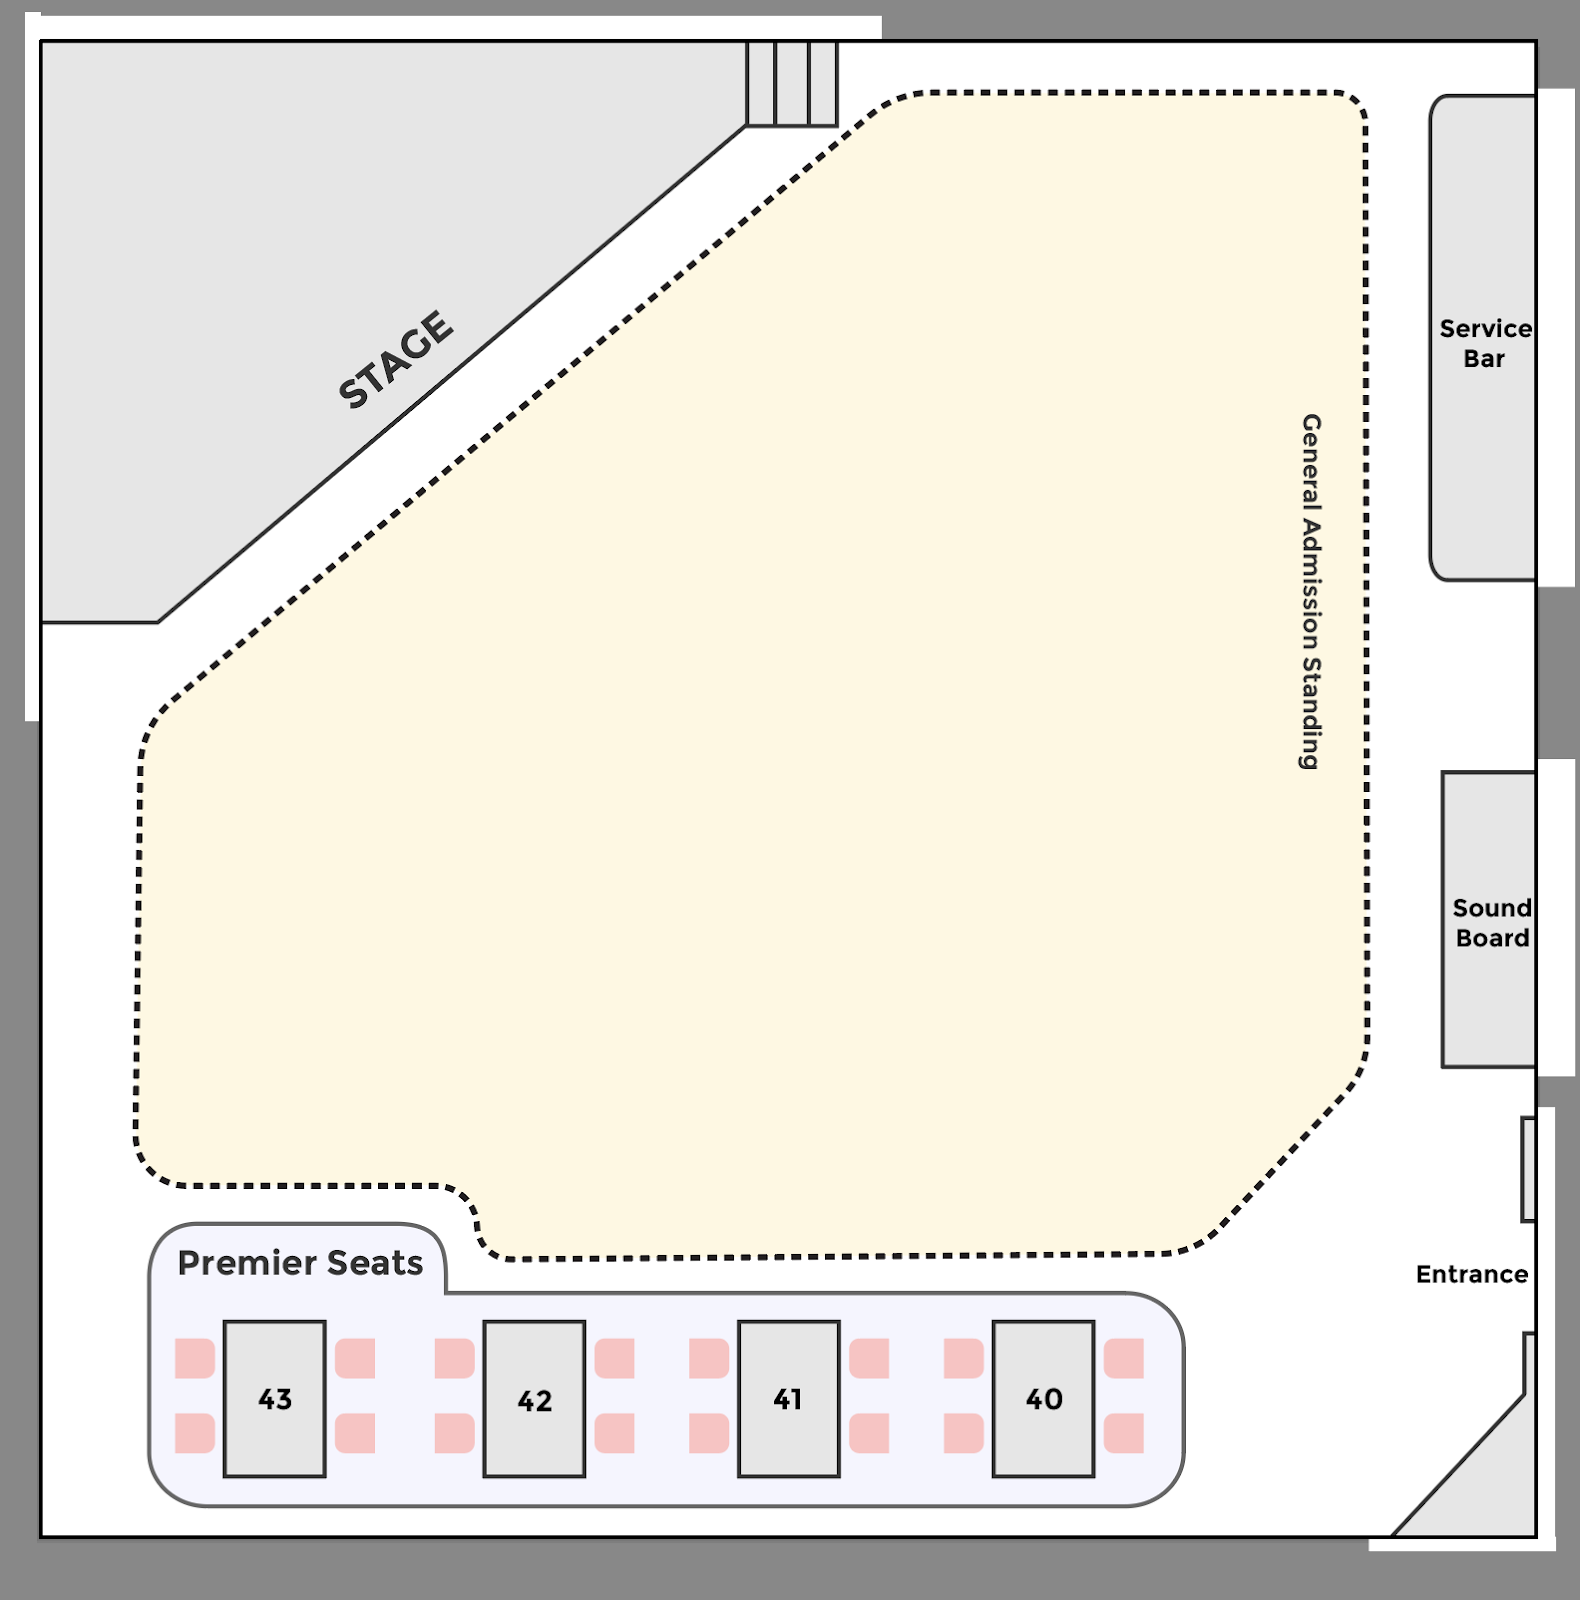
2. Notice how each seating type is on its own layer. If you click into each layer, then group, you will see that each seat has a specific name or ID. This ID will be very important later. We want to have clear, specific ID names for each seat.

3. Make desired changes to the seating chart, ensuring to add the seat names if necessary. These seat names can also be added in code later. The seat names should be in this format: [sku]-[group]-[seat].
4. Save the seating chart as an SVG.

5. Now open your new seating chart SVG file in a coding editor, we used Visual Studio Code.
6. Once opened, you will need to find your IDs with the names you gave them, our example we have PREM-41-A, This is the Premier Seats area, table 41, seat A. If you have new seats, you will have to edit or add a class tag, fill color and data-selected-fill. The fill color is the default seat color while the data-selected-fill color is the color it turns into when selected. The colors are in a HEX format (6 characters). You can find hex codes for colors here: https://htmlcolorcodes.com/color-picker/.
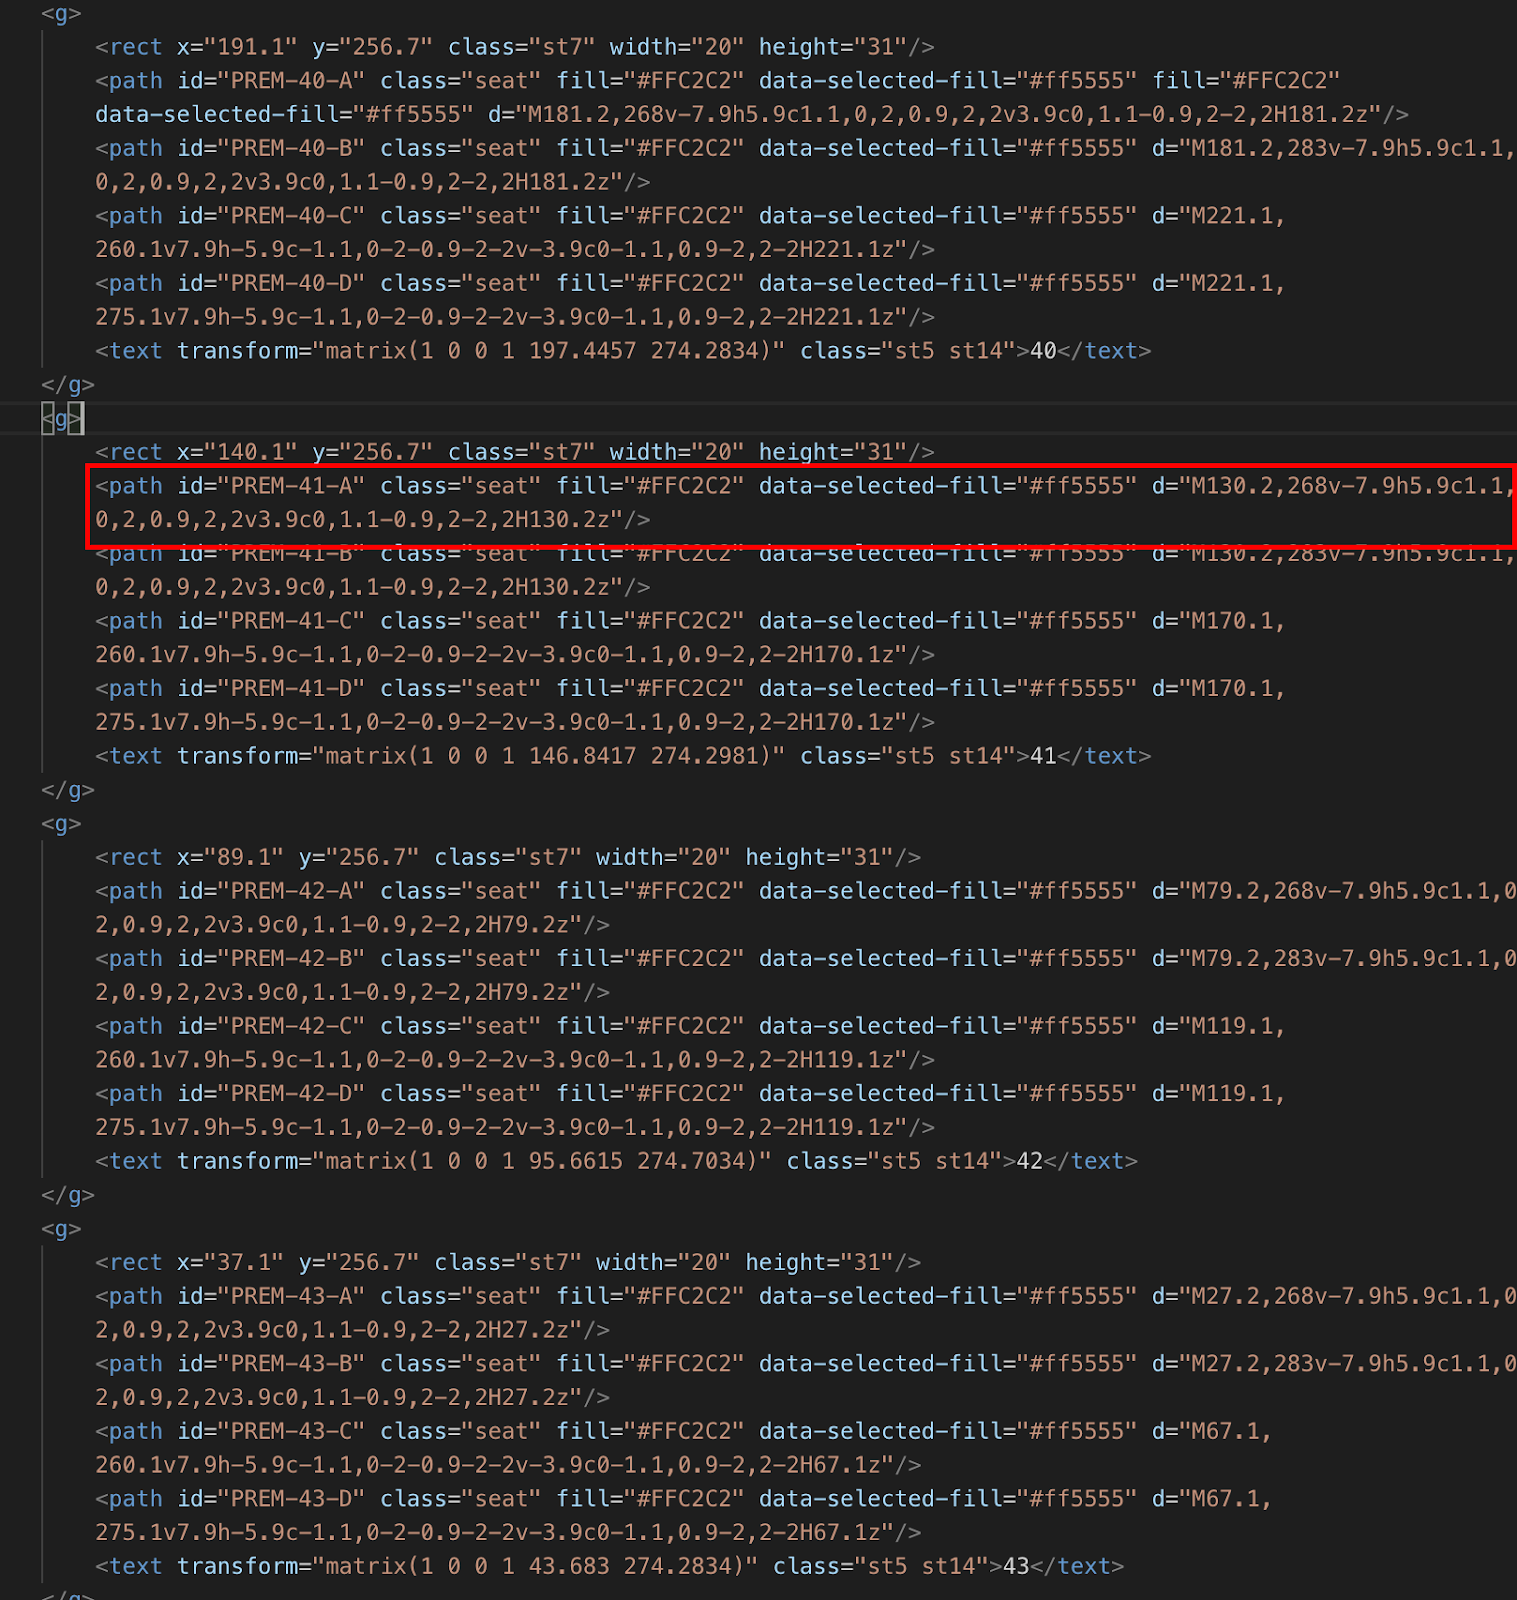
The id is the name we gave the seat in Illustrator, the class tells us if it is a seat or not, the fill is the color of the seat, data-selected-fill is the color of the seat when clicked.
7. Save the SVG and copy all the information.
8. In the admin area of Tessera go to Settings > Seating Charts > Add Seating Chart

9. Name your seating chart
10. Input the Seat ID Template, for now they all follow [sku:4]-[group:2]-[seat:1], the numbers represent the number of characters per each section of the ID (the one we made earlier). There are 4 characters in PREM, 2 characters for the table number, and 1 character for the seat.
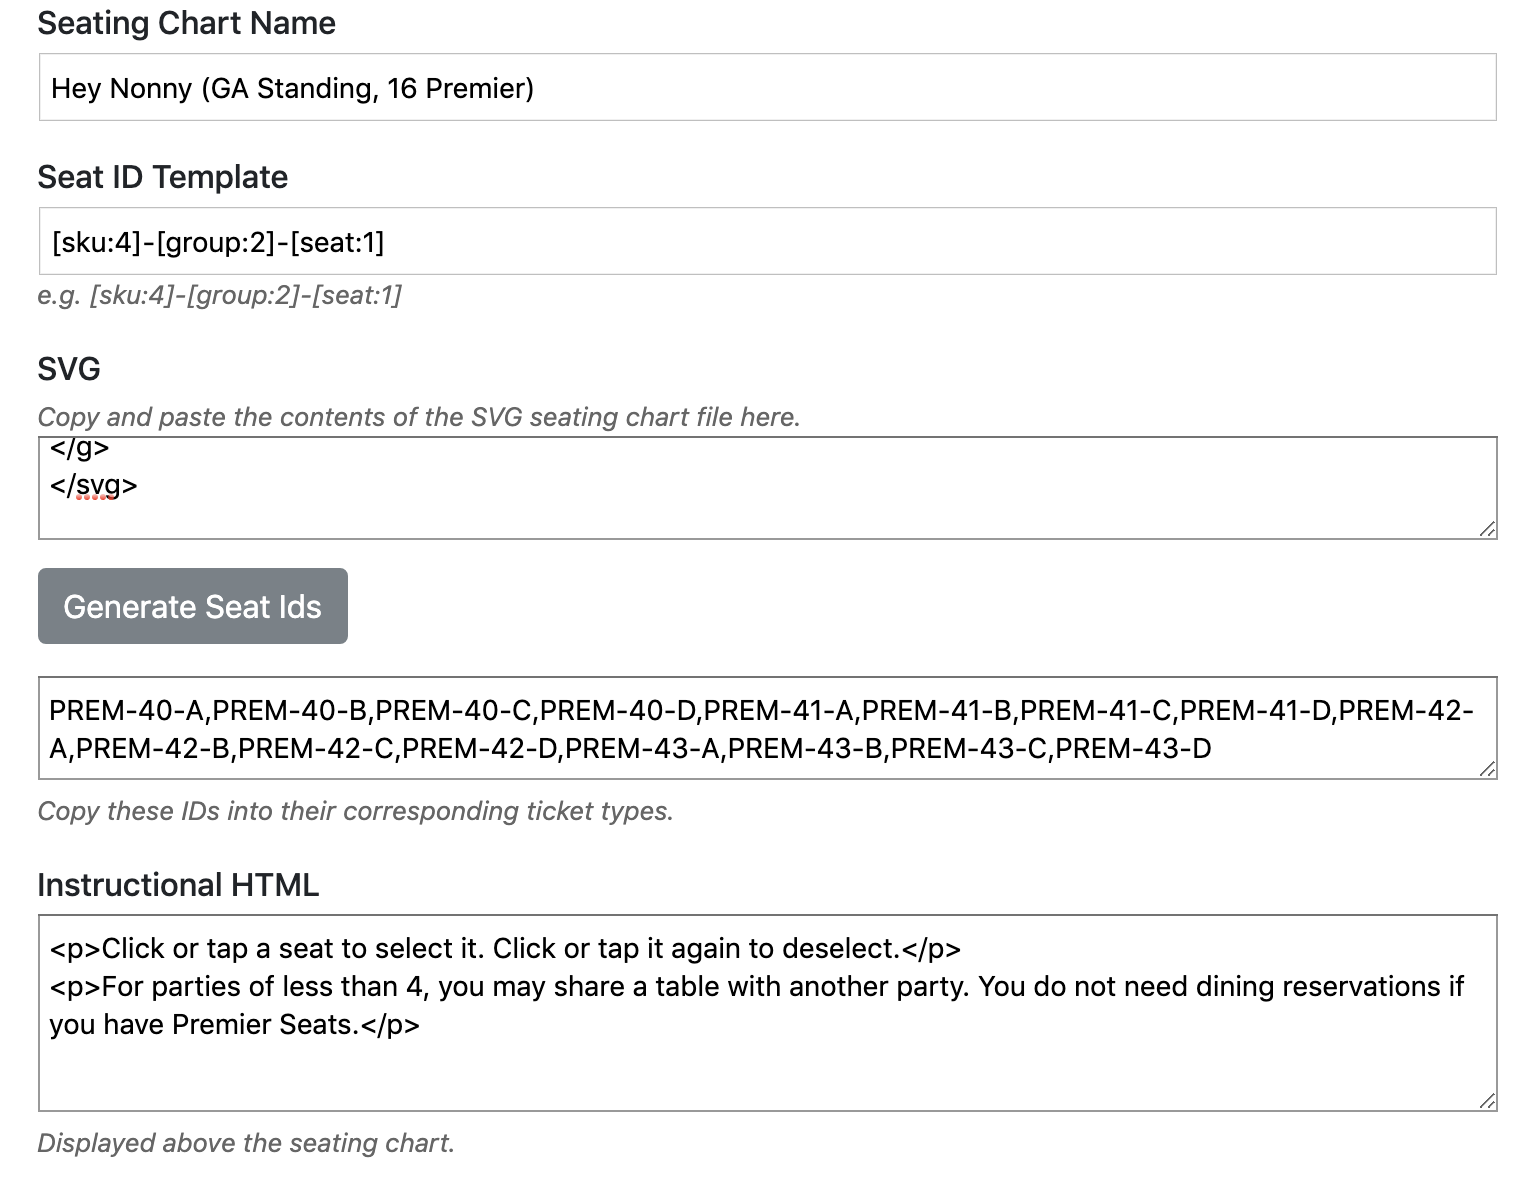
11. Now paste all the code from your SVG image, then click “Generate Seat Ids”, we will copy this for later on down the page.
12. The instruction HTML is the instructions you want to display on the seating chart for users to see.
13. Now we want to select which Ticket Types are a part of the new seating chart we made. The only seating we have on this example is “Premier Seat”, so that is what we have selected. Here you can paste all the “PREM” seats that appear in the “Generate Seat Ids” section.

We won’t select General Admission here, because we only want to select the seats that are clickable in the seating chart. Other ticket types are handled differently.
14. Click ‘Save’ and we are finished! You can now apply your new seating chart to any shows.